< All Topics
Print

Projects

Step One

Set Customer as Builder.

In order to activate the project tab in OpenJanela, the customer has to be set as a builder.

  • In customer management, go to the details tab
  • Click on the Builder checkbox
  • Save changes
Projects
Projects

Step Two

Create new Project

  • Go to the Documents tab
  • Click on new

Step Three

Create project attributes

Attributes Define how the project is Organized, for example Buildings and Facades, or Floors.

In the example we will use here, we will create 2 buildings – Bldg 1 with 2 Floors and Bldg 2 with 1 floor.

  • Click on new attribute as Building 1 and Parent attribute as “None”. Save attribute.
Projects
Projects

Step Four

Add items to the project

  • Add items as you would normally do.
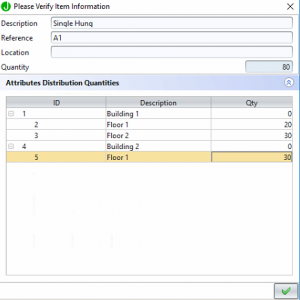
  • At the time of Saving, you will notice that the Save dialog asks for the Qty per Floor (attribute).
  • Enter the Qty Required for each “Window/Product design and Size” – Usually these are detailed in the project Schedule supplied by the builder. For example A1 Or A2, etc.
    Save the Line Item

Step Five

Create Project Phases

  • On the project header, select Phases tab.
  • Select thew New phase button
  • Enter a description
  • Enter date required
  • In then attributes section, you will find the items available to add into the phase.
  • Select the desired items from the “Available” column and click the “>” button to add to the “Selected” column.
Projects
Projects

Step Six

Click Save to update the project.Projects

Step Seven

Mark the project as won by clicking the “Approve” button.

This will make all phases available to be released as individual orders.

Projects
Projects

Step Eight

Click on “Release Phase” button to show the available phases to be released.